How to Remove Bindweed from Garden [In 8 Easy Ways]
The list of weeds that complicate the life of gardeners is very long. Among them, there are those that are extremely difficult to get rid of. In this article, we will tell you how to remove the bindweed from the garden, a cute in appearance, but incredibly insidious weed.
Bindweed is a herbaceous perennial plant from the family of the same name with an extensive root system that penetrates the soil layers to a depth of 2-3 meters. The flowers, painted in white, light purple or light pink, are funnel-shaped. The flowering period of the bindweed plant lasts from May to August.
Bindweed occurs in almost all arable crops and is particularly problematic in permanent crops, the garden, and in the summer house, for the following reasons:
- promotes the fastest drainage of the soil and deprives it of moisture due to the strong root system;
- long stems quickly wind around crops, depriving them of light and nutrients;
- actively reproduces by means of seeds, but by root system;
- plays the role of a refuge for numerous insect pests;
- depletes the soil and slows the growth of crops.
If you don’t remove the bindweed in a timely manner, it will grow quickly and close plantings from sunlight. The grass intertwines the support plant, and it will be impossible to remove it from the ground.
The plant will need to be cut into parts. But after a while, the bindweed will grow again, as parts of the root system after the procedure will remain in the soil. Therefore, it can take 2 years to control this herb. The bindweed should not be allowed to bloom, as its seeds remain viable for 4 years.
How to Identify Bindweed

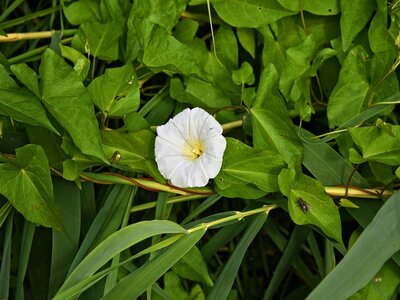
Bindweed can be recognized by the medium green, arrow-shaped leaves and white-pink flowers. Bindweed can grow to be four feet or more in length and has deep, strong roots. It is considered an invasive plant because it is so persistent that it can easily suffocate native species. It is a less hardy plant in northern climates, but it is still harmful and can wreak havoc in the garden.
Bindweed stems are branched, blunt hexagonal, prostrate or twisting and are up to 120 cm high. The mostly gray-green, bare leaves are alternate, stalked, oblong-egg-shaped with an arrow-shaped base and rounded at the tip.
The bloom extends from early summer to early autumn. The fragrant, funnel-shaped flowers are in the leaf axils and are light pink or white with five red outer stripes.
It is a perennial vine that crawls its way across the ground and over fences, plants, or other stationary things. The presence of bindweed is identified by the thin, thread-like vines that wrap tightly around plants or other upward-facing objects.
Eventually, leaves that are shaped like an arrowhead grow on the bindweed leaves. After the leaves appear, the connective flower begins to grow. Bindweed flowers are trumpet-shaped and either white or pink.
Below, we’ve listed 8 different ways to remove bindweed from the garden.
1. Removing bindweed from the garden by Regular Weeding

No matter how trite it may sound, it is this simple weeding technique that can help you remove the bindweed. However, there are a few rules to follow when weeding:
- For the fight to be effective, you need to know several features of the bindweed. After damage to the rhizome, a new shoot immediately begins to grow from the dormant bud of the weed.
- First, it uses the nutrients accumulated by the root for growth. The root, giving up its reserves, weakens and depletes. When the sprout reaches the ground and the green mass begins to grow, the process of photosynthesis will start.
- As a result, the production of nutrients will begin, the rhizome will replenish its expended reserves and return to normal. Therefore, our goal is to prevent the root from recovering.
- And for this you need to remove the sprouts that have appeared as soon as they hatch from the ground, preventing the leaves from appearing.
- The removal of the emerging plants should be carried out regularly. The root will be able to help the dormant buds germinate several more times, but as a result, its strength will be depleted so much that new shoots will cease to appear, the bindweed will die.
The weeding should be done in spring or in early summer and the soil should be rather dry. It is imperative to gently turn the soil with a fork or a spade to about 25 to 30 cm deep. Remove all the root ends. This action is delicate, and the roots must not be broken.
If you don’t just want to keep the bindweed in check but want to get rid of it for good, you have to repeat this procedure over and over again throughout the entire growth phase. Therefore, it is best to check the affected areas every two to three weeks to cut the fresh tips. In this way, the roots of the bindweed also die off.
However, be careful not to let the weeding intervals become too long. Otherwise, the weeds can replenish their reserves through the grown leaves and the fight will be prolonged.
It usually takes at least a year until you completely remove the bindweed by weeding, and it may take longer if the roots are already very branched.
2. Removing bindweed from garden by Digging

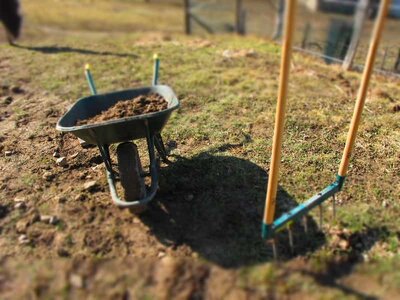
Digging up bindweed is one of the most effective methods of removing it from the garden. It is best to do this on sunny and slightly windy days, as the dug-up roots dry up relatively quickly in the air. One should, however, proceed with particular care, because every root residue that remains in the soil can develop new plants again and the problem is the same again.
To dig out you need a digging fork, a weed picker, and a fine-meshed garden sieve. The use of a spade is not recommended. First, you remove the plants with a high-quality weed cutter. You should try to pull as many roots as possible out of the immediate vicinity of the plant with a lot of sensitivity.
Then you dig the ground up to three depths of a spade with a digging fork. You should thoroughly remove every part of the root, no matter how small, and best collect it in a bucket or something similar.
Now the pass-through sieve is used. Above all, this should be fine-meshed. The excavated material is then sifted piece by piece and possible root residues are removed immediately. If necessary repeat the whole thing again.
Then the sieved soil can be spread out again. Under no circumstances should the removed root residues be disposed of on the compost but in the organic waste bin or household waste. If possible, they can be burned.
However, digging has one major drawback, especially when using a spade. When digging out with a spade, the bindweed’s roots can be pricked or chopped up in such a way that this tends to contribute to the spread of this plant.
3. Remove bindweed from garden using Sowing Green Manure
Another way to remove the bindweed from the garden is to sow green manures in the garden. Any green manure with a branched root system can be used, such as rapeseed, mustard or fescue. It will be difficult for bindweed shoots to break through the dense carpet woven from their roots.
If you have free space, then you can cultivate green manures throughout the season. In the spring, at the end of April, the beginning of May, sow the empty areas, clogged with bindweed, and mustard.
Let it grow fully and form seeds. Mow the mustard in late summer. Fallen seeds will sprout and give new shoots. In the fall, mow them again and embed them in the ground. Such manipulations will help in several seasons to completely get rid of the bindweed in the garden.
If there are no free areas, then instead of siderates you can plant corn or a sunflower. These plants have a very branched, fibrous, and powerful root system. The bindweed is unlikely to be able to break through the soil permeated with its roots.
Cleaning a garden pond should an easy job if you follow the steps described in this article!
4. Remove bindweed from the garden using Mulching material

Everyone knows that no plant can live without light. You can use this feature in the fight against bindweed.
A promising way of removing the bindweed is to cover the infested area for at least one year. This method is particularly suitable if the bindweed has already spread to a large part of your garden. This will suffocate the bindweed because it receives less oxygen and light underneath and thus dies over time.
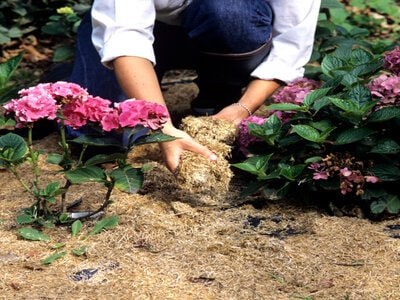
For this, you can use foil, cardboard, or weed-protection fabric. You can find these materials, for example, in hardware stores, gardening supplies, or in online shops. So that your garden looks beautiful even during this time, you can cover the whole thing with bark mulch, sand or earth.
Is important to know if bindweed seeds are still in the ground before covering, it can happen that they sprout when the area is uncovered again because their seeds remain viable for up to 20 years.
It is therefore advisable to dig the area once before covering it, or at least to remove the flowers with the seeds that ripen in them.
5. Remove bindweed from garden by Improving soil quality
The next step in getting rid of bindweed is to understand why bindweed is present on your yard. The bindweed is a bio-indicator plant that develops on compacted soil, either because it has received an excess of nitrogen (fertilizer, unbalanced compost, etc.), or because it was left bare during the winter and the snow and rain packed it down.
The compaction of the soil has the effect of breaking the dormancy of bindweed seeds whose long roots will work to loosen up the soil: nature works alone to restore its own balance.
Faced with this situation, you have two options: let the bindweed aerate and loosen the soil (this can take several years) or accelerate the process started by carrying out next:
- A balanced supply of organic matter (compost) in the fall (between September 15 and October 15 *), covered with thick mulch. In the following spring, the ground will be cleaned.
- And / or a passage of spade or other toothed tool, provided that it does not overturn the earth.
Speaking of dead yellow leaves, here are the reasons why yellow leaves appear on a plant!
6. Deacidification of the soil
Field bindweed loves acidic soil. This means that you can remove the bindweed by alkalizing the earth.
In what ways can this be done? We list the most popular materials that allow you to deoxidize the soil:
| Lime | It is better to apply it in the fall, after harvesting, so as not to harm cultivated plants | 0.3 kg per 1 sq. m |
| Chalk | Like lime, is introduced only in the autumn period | 0.4 kg per 1 sq. m |
| Dolomite flour | It can be added to the soil not only in the fall, but also in the spring, during the digging of the soil | 0.4 kg per 1 sq. m |
| Ash | Is not only a good soil deoxidizer, but also an excellent natural fertilizer | 1 kg per 1 sq. m |
7. Remove bindweed from the garden with hot water
Root weeds such as bindweed can be removed with hot water at least as long as they are small plants with roots that are not too extensive. Huge roots, on the other hand, are completely unaffected by this method.
To do this, first remove all aerial parts of the winch and then pour the still-boiling water over the main root. As a rule, the dead bindweed can be collected after a few days. If necessary, the process must be repeated until no new bindweed shoots appear.
8. How to remove bindweed from the garden with herbicides
It is necessary to resort to chemical preparations in the fight against bindweed only if all means have been exhausted, and it continues to capture new territories. But even potent herbicides will not help you to cope with bindweed at once, so you will have to use them more than once.
To remove the bindweed from the garden, it is better to use glyphosate herbicides, which, falling on the aerial part of the plant, penetrate inside and move along the pathways to its root system. This is how the weed is gradually being destroyed.
To make the use of herbicides effective, do not carry out any work on the treated area for 3-4 weeks after application. If you accidentally touch a bindweed rhizome that has not yet died, dormant buds will begin to grow and the weed will continue to grow.
Before using herbicides, read the instructions carefully. Many herbicides can be applied only after harvest or in vacant areas. During the growth of garden crops, their use is prohibited.
How to avoid bindweed appearance in the garden
To avoid bringing bindweed into your garden, beware of any outside soil or compost that may contain roots or seeds:
- Tear off all aerial parts to prevent the seeds from spreading
- Don’t skimp on mulching: a thick layer (15 cm) slows down the growth of bindweed,
- When working the soil, remove as many roots as possible by aerating the soil using a spade fork or a broadfork.
- Burn the roots once they are dry.
- Do not use a rototiller or a spade which will fragment the roots. Bindweed thrives in overworked soils.
- Persevere, it pays off: bindweed should never have time to replenish its reserves.
- Use a gouge to dig out the bindweed as deeply as possible.
- Avoid planting on a plot “contaminated” by bindweed, telling yourself that you will remove it as you go: it is much more difficult and your young plants will have difficulty fighting against the competition it exerts.
Conclusion
Indeed, to get rid of this bindweed from the garden, there is unfortunately no miracle solution. However, different methods make it possible to partially eliminate the bindweed, or in any case to limit its development, provided you have patience.
The successful remove of the bindweed is always a lengthy affair and usually only brings the desired success through long-term control over several years.
Even if it looks like the problem has been solved, you should always stay tuned and remove newly emerging windrows immediately; this can at least prevent it from spreading too much.
The only thing that really promises success is usually the complete removal of all root remains, which is usually hardly possible.
If all control measures have been unsuccessful and these stubborn weeds keep coming back, one should perhaps try to come to terms with this unloved troublemaker and limit oneself to being able to contain the spread of the bindweed.


